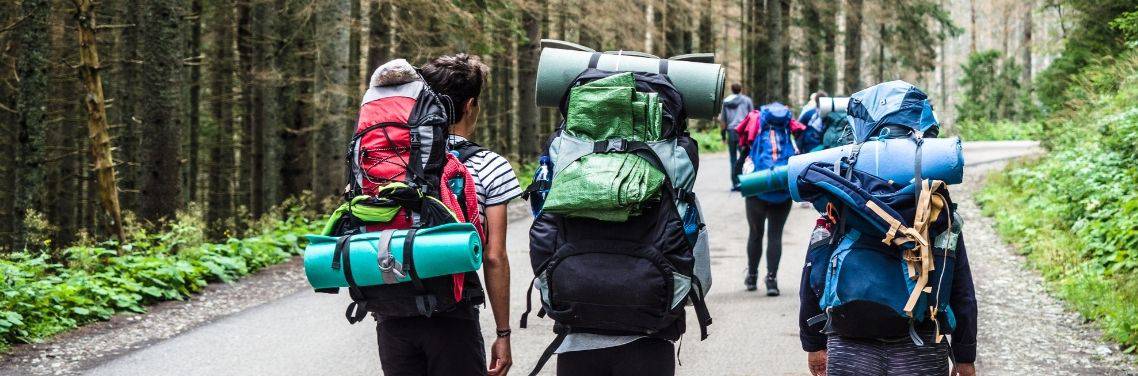

How to Pack a Hiking Backpack
When preparing for a hike, whether it be for the weekend, a week, or months, the way you pack your hiking backpack is just as important as determining what you’re going to bring on your hike and where you’ll be laying your head for the night. An efficiently packed hiking backpack will be more balanced and comfortable.
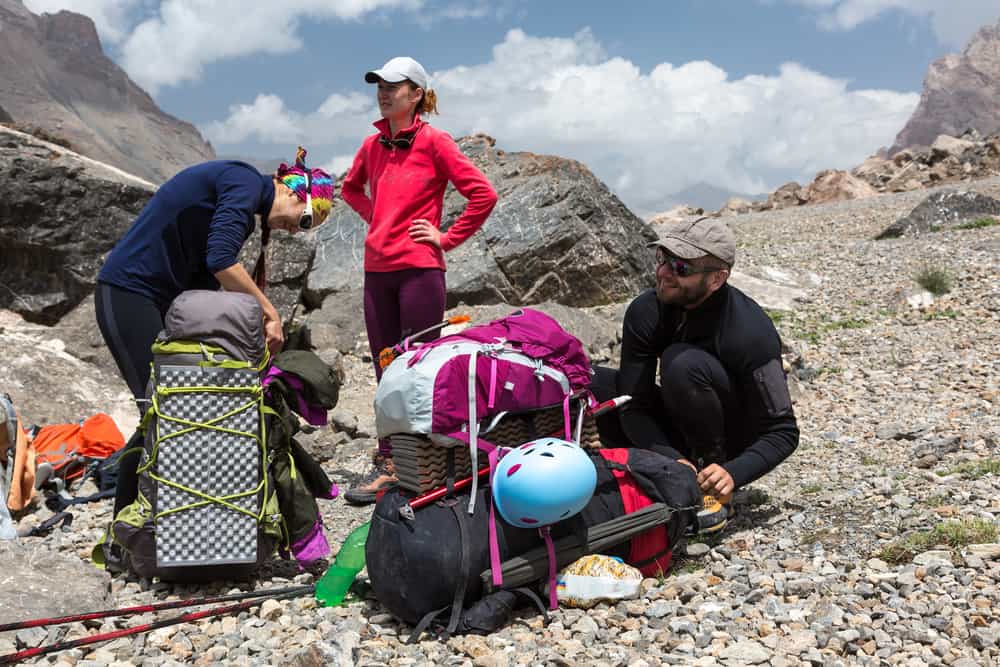
Packing your backpack

Typically, your hiking backpack is going to have three general sections – the bottom, the body, and the brain. There will also be accessory pockets, daisy chains, and external storage. Again, while each person’s pack is going to be a bit different, there are some general guidelines you can follow to ensure comfortable weight distribution, efficient use of space, and convenience while on the trail.
The weight distribution of your pack can help aid in stabilization and balance if packed correctly. It is generally recommended that the heaviest items are closest to your back and center of your body, the lightest items nearest the bottom of your bag, and the mid-weight items at the front and top.
It is also important not to overload your pack. Carrying around unnecessary weight or too much weight for your body will make for a miserable and potentially harmful trek. As a rule of thumb, it is best to only carry 25% – 30% of your body weight on the trail. While this may vary based on experience and strength, it is good to keep in mind while packing.
Bottom

The bottom of your pack should be utilized for bulky, shock-absorbent items that won’t be necessary to pull out until you set up camp for the night. This section of your bag should have the most lightweight items according to weight distribution.
- Sleeping bag
- Sleeping pad
- Warm clothes for sleeping
- Camp shoes
Body
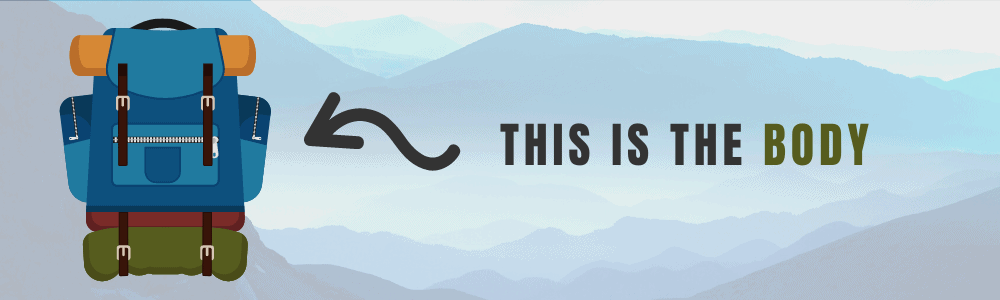
The body, or core section, of the bag, should include the bulk of your dense items. This section can help stabilize your center of gravity and will aid in balance and ease of motion on the trail if packed properly.
- Food
- Stove
- Cook kit
- Water reservoir
- Bear Canister
- Extra clothing
- Tent body/rainfly
Brain

The brain of the backpack is the uppermost section of the pack that sits on top of the body of the pack. This is usually removable for day use and should store any of your bulky essentials that you’ll be using on the trail and throughout the day.
- Insulated jacket
- Warm pants
- Rain jacket
- First Aid kit
- Toilet supplies (toilet paper, trowel, menstrual products)
- Electronics (*stored in a dry bag)
- Trail Snacks
Accessory
Accessory loops and external pockets are best used for any odds, ends, and essentials you’ll frequently be using throughout your hike.
- Cash and/or credit card
- Car keys
- Identification
- Headlamp
- Sunscreen/sunglasses/hat
- Bug spray
- Lip balm
- Map, compass, GPS
- Campstool
- Tent poles
- Trek poles
- Climbing rope
- Ice ax/crampons
- Lighter/firestarter
While it’s helpful to have a variety of daisy chains and external accessory loops, it is not recommended to rely too heavily on these to carry things outside of your pack. Strapping items that are bulky and may swing around put you at risk to snag a branch or a fellow hiker while on the trail.
Tips and Tricks
- Lay everything out before you start packing to double-check essentials and get rid of any unnecessary items.
- Fill your water reservoir and place it in the body of your pack first and foremost. It may not fit well if this is one of your last items to pack.
- Wrap soft items, such as your tent body, rainfly, or extra clothes, around bulky items in the body of your pack to maximize space.
- If you’re carrying a bear canister, store as much food and scented items inside the canister as possible.
- Line your pack or store items that aren’t water-resistant in a trash bag.
- Pack your bag with all compression straps loose or unhooked when packing and tighten them once packed.
- Utilize gear ties and carabiners to fasten smaller items to the outside of your pack.
How to safely put on your pack
Being able to safely don your pack, rather than just whipping it up by a shoulder strap, can reduce your chance of injury and also extend the life of your backpack.
First, loosen your pack’s shoulder straps, load lifters, and hip belt. Stand in a wide stance with legs slightly bent to maximize your balance. Begin by lifting your pack onto your knee with the haul loop. Slip one arm into the shoulder strap while it’s resting on your knee, then hoist the pack onto your back. Slip the arm holding the haul loop into the other shoulder strap, and then adjust your straps, lifters, and belt in a comfortable position.
What to bring on a hike
There isn’t a one-stop, all-encompassing checklist to determine exactly what you’re going to bring on your hike. Every trip and every person is different. However, there are a handful of essentials you should pack for every hike, and you’ll be able to pack much more efficiently and conveniently with a hiking checklist in mind.
Hiking Essentials
While every hike is going to be unique and require different gear, there are some items that you should not step on the trail without. The American Hiking Society has created a 10-item list that will allow you to hike safely and comfortably each time you hit the trail. Additionally, check out our complete hiking and camping checklist here.
- Proper footwear – When your only form of transportation is walking, good hiking shoes and happy feet are crucial to a pleasant and safe hike.
- Map, compass, and GPS – Google Maps will only get you so far in the backcountry, miles away from any cell towers. AllTrails is a good hiking app but best to bring a map and compass just in case you take a wrong turn or stray from the path.
- Hydration – Bring plenty of water and a way to purify it.
- Food – You’ll burn a lot of calories on the trail, so calorie-dense foods are a good option to keep your body running top-notch. Bring extra food in case you’re gone longer than expected.
- Rain gear – Nothing is worse than getting soaked in the rain. Make sure you prepare for the weather to stay as dry and comfortable as possible in varying conditions.
- Safety Items – AHS recommends bringing means of making an emergency fire, signaling for help, and a light or headlamp to see the trail and map in the dark.
- First Aid Kit – Ensure that you can clean and tend minor injuries and illnesses should they arise on the trail.
- Knife or multitool – Great for multiple uses as the name suggests, a multitool is helpful for anything from first aid to gear repair.
- Sun protection – The sun can bring on a myriad of illnesses and discomforts. Protect your body with countless measures like sunglasses, a hat, sunscreen, and covering clothing.
- Shelter – Whether it’s a tent or even something small such as a space blanket, make sure you have means of protecting yourself from the elements when you need to.